Using Forkdrop Suite To Find My Coins
Introduction
Fork and airdrop coins exist on smaller networks and are supported by much smaller development groups than you may be used to with Bitcoin (BTC) and other large coin projects. Finding coins using their tools is generally a bit difficult and also require repetition for every single coin. An alternate approach to finding coins is to infer them from the transactions on the Bitcoin (BTC) blockchain and what we know about the fork and airdrop rules. If we know the fork/airdrop rules of every coin's launch, we can find all of them using the same tool.
There are several fork and airdrop coin-finding services on the web, but we do not recommend using any of them without taking special steps to protect your privacy. Also, their datasets are partial and somewhat unmaintained, so the info you get may be an incomplete picture of the coins you own. The more concerning issue is that querying theses services with your public Bitcoin addresses can reveal you as the owner by several known internet tracking and de-anonymization mechanisms. Also, people querying these services might trend to those with more BTC than average which might be even an even more enticing group for bad actors to de-anonymize.
The simple truth with these other services is that even if they are constructed with good intentions of helping you, their intentions could change, be corrupted, or be circumvented by some other intercepting actor (like their hosting provider). For this reason, we recommend you upgrade your approach. We have provide a tool which accomplishes the task with a superior method with a complete dataset which also protects your privacy. The same tool also comes with the additional benefit of streamlining your claiming of these coins if and when you choose to proceed with that.
Claim Prep Tool
Forkdrop Suite provides a script claim-prep.py which is intended to be run on TAILS. The tool must access the BTC transaction
record for the provided addresses provided via either: 1) blockchain.info via their Tor gateway. or 2) via an Electrum server of your choosing.
Using the block explorer is more convenient, but has the downside of it being a centralized service. Also, the block explorer's .onion access point is frequently down or sometimes guarded against automated bot spam with captchas, which makes it unreliable. For best security, we recommend selecting an Electrum server. This requires some extra effort and a bit of trial-and-error to locate an appropriate one which is covered in a dedicated article:
For simplicity, the articles provide examples of using the tool without the --electrum-server option, which makes the tool default to using the blockchain.info API via the .onion URL.
This transaction record data combined with the forkdrop.io dataset (bundled with the tool for your private, offline use) allows us to infer which coins you own and generate a customized, detailed report of which coins you own and detailed, customized instructions for what you need to do to claim them.
Furthermore, we do also have provided another script called direct-query-claim-prep.py which has a set of per-coin plugins implemented to use Tor to query the specific services of each coin to automatically obtain more specific useful
details that the blockchain.info or Electrum server queries cannot provide. At the moment, this only includes implementations for a minimal subset of coins where the Bitcoin (BTC) transaction record details aren't sufficient. However, there is no technical reason this could not be extended
to include every operational coin network with some modest effort.
Patches are welcome at the GitHub page.
Setup
Our guides on setting up TAILS and downloading Forkdrop Suite are covered in these articles:
To start using the claim-prep.py script, you need to have the Terminal application open and in the cloned forkdrop_suite directory:
Usage
Like with all scripts in the suite, executing with just the help flag -h outputs the usage documentation for the script:
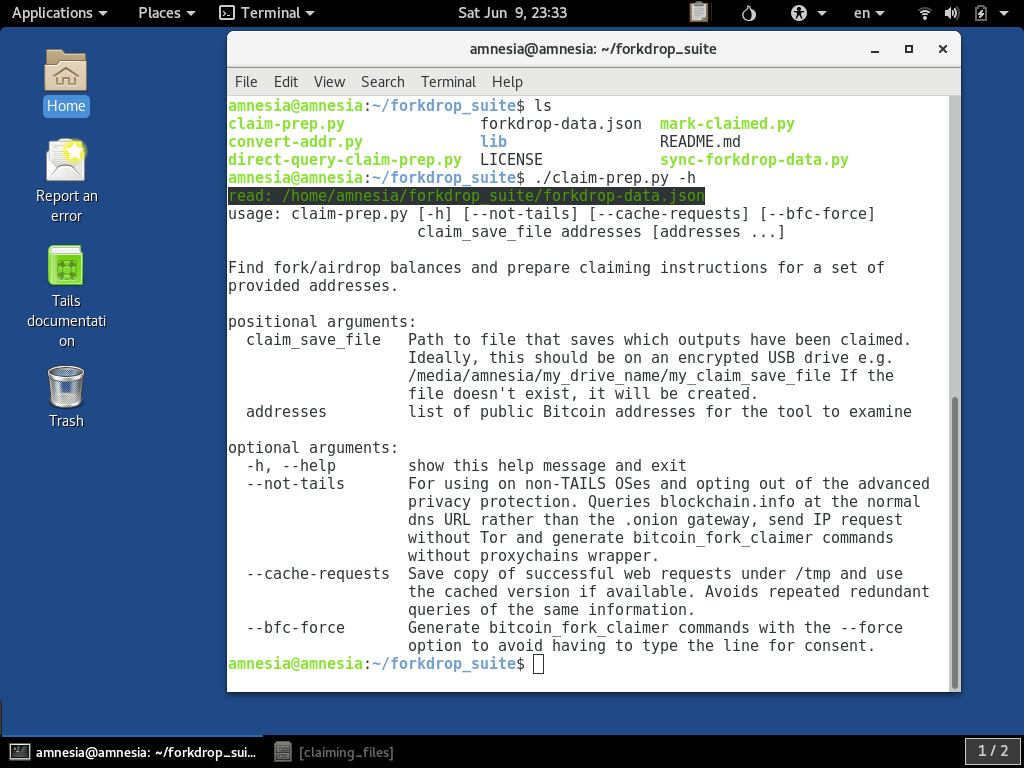
The first required parameter is the claim_save_file parameter. It must be specified. We cover some of the concepts for using this to keep organized when claiming in another article:
However, if that is too much to dive into at the moment, that is alright, you can give a value such as /tmp/save_file for now. The second required parameters is one or more public Bitcoin (BTC) addresses we wish to find coins for.
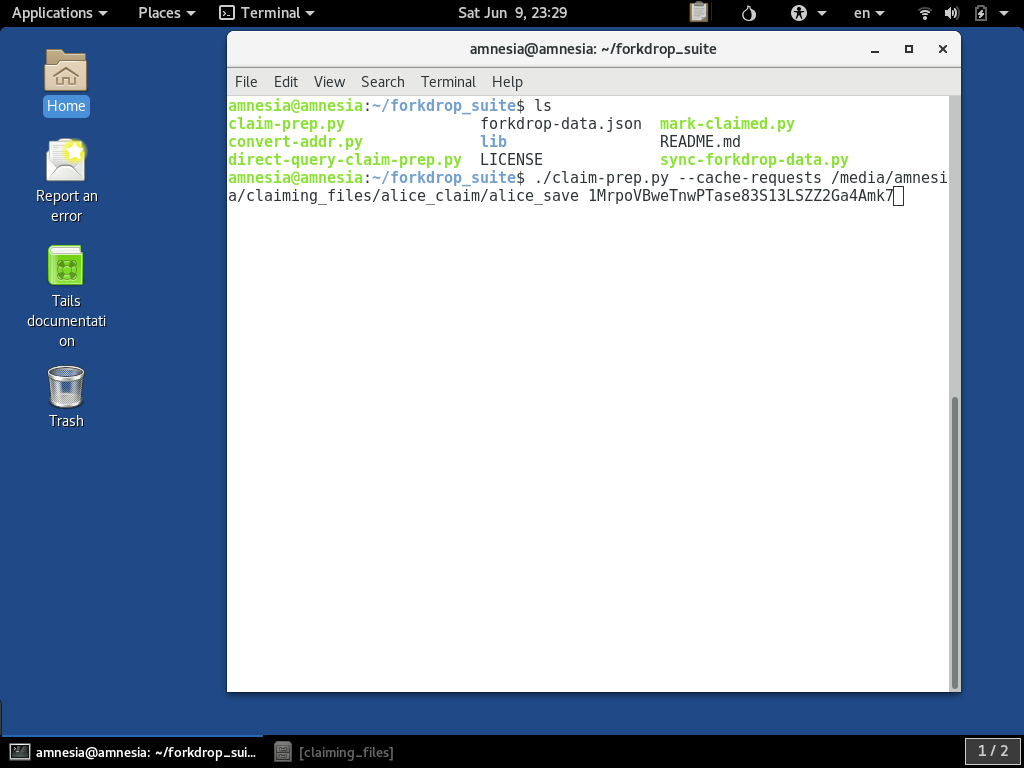
For this example, we will use the single address 1MrpoVBweTnwPTase83S13LSZZ2Ga4Amk7:
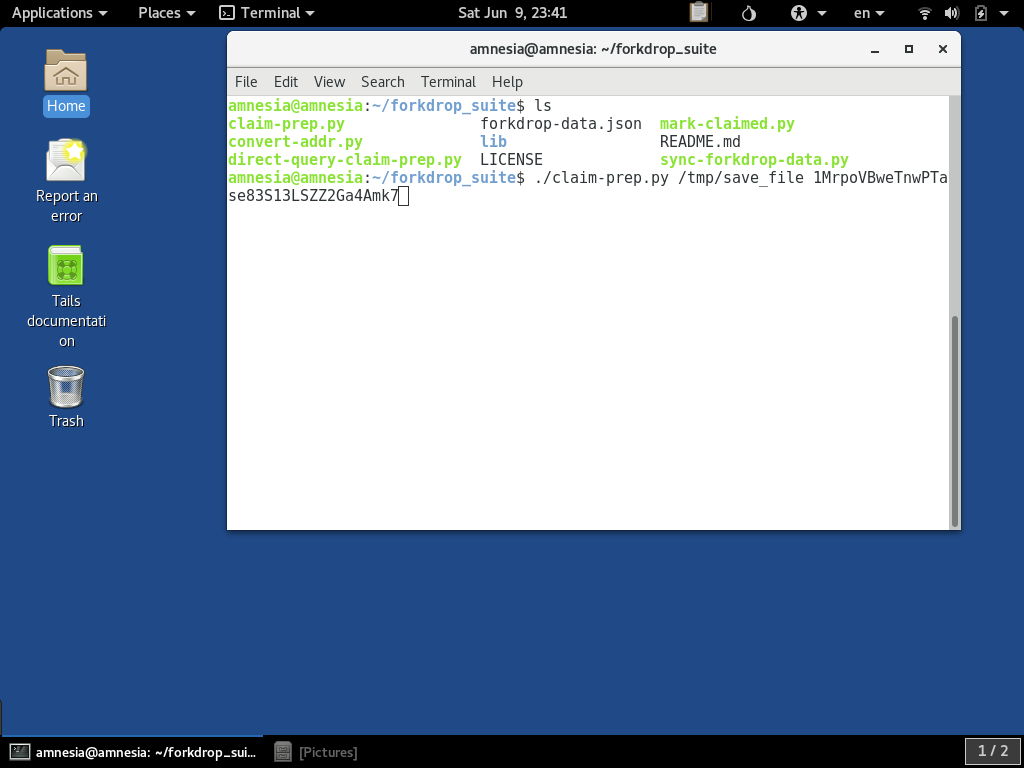
Running
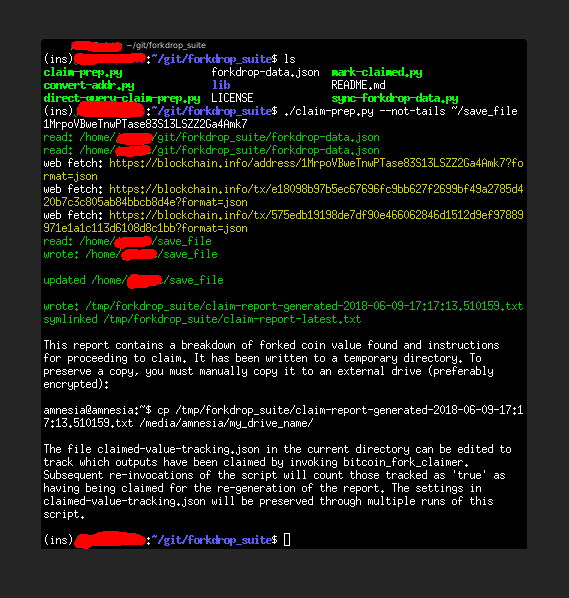
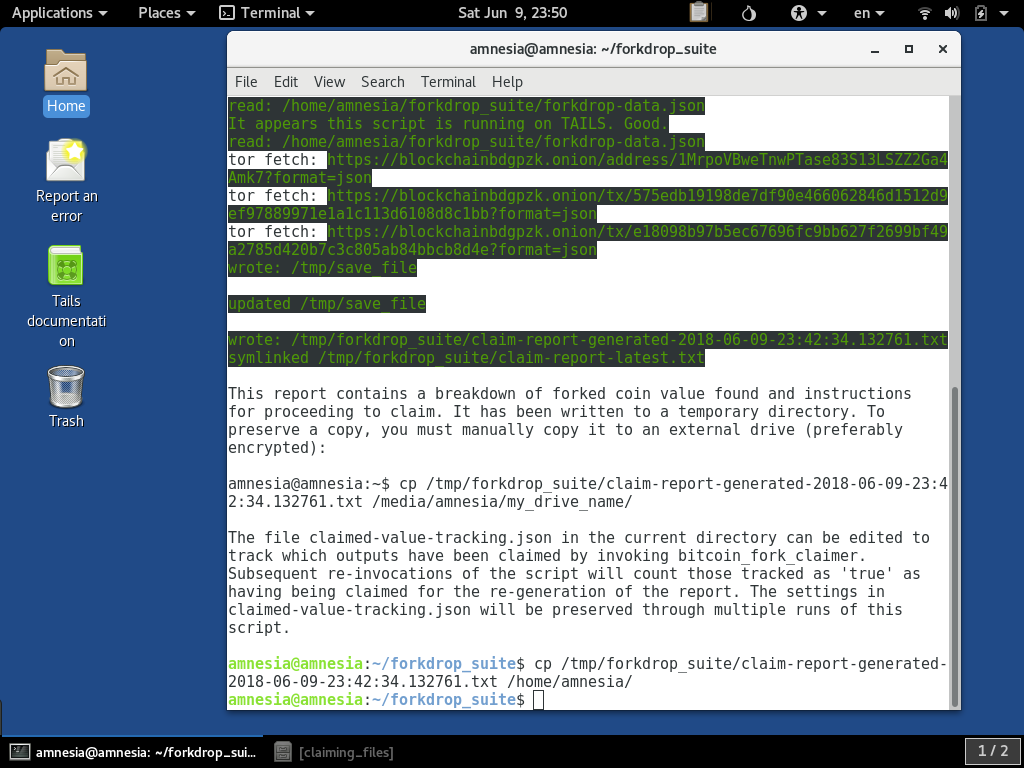
When this is run with our example parameters, it will query out to Blockchain.info over Tor and assemble a report, which it informs you of from the console output:

As also informed in the output, the claim report has been written to a file with a timestamp under /tmp/forkdrop_suite. It also generates you a command which is suggesting you copy it to a mounted external drive for if you wish to
save a copy. Today, we just want to look at, but our other article covers saving to a drive. To copy it to your home directory you can run
the cp but with the destination directory simply /home/amnesia/:
For now, we can close the Terminal, since we can use the GUI tools to look at it.
Viewing the Report
If you open the GUI file browser, you should see the report text file we copied to /home/amnesia in the view of Home:
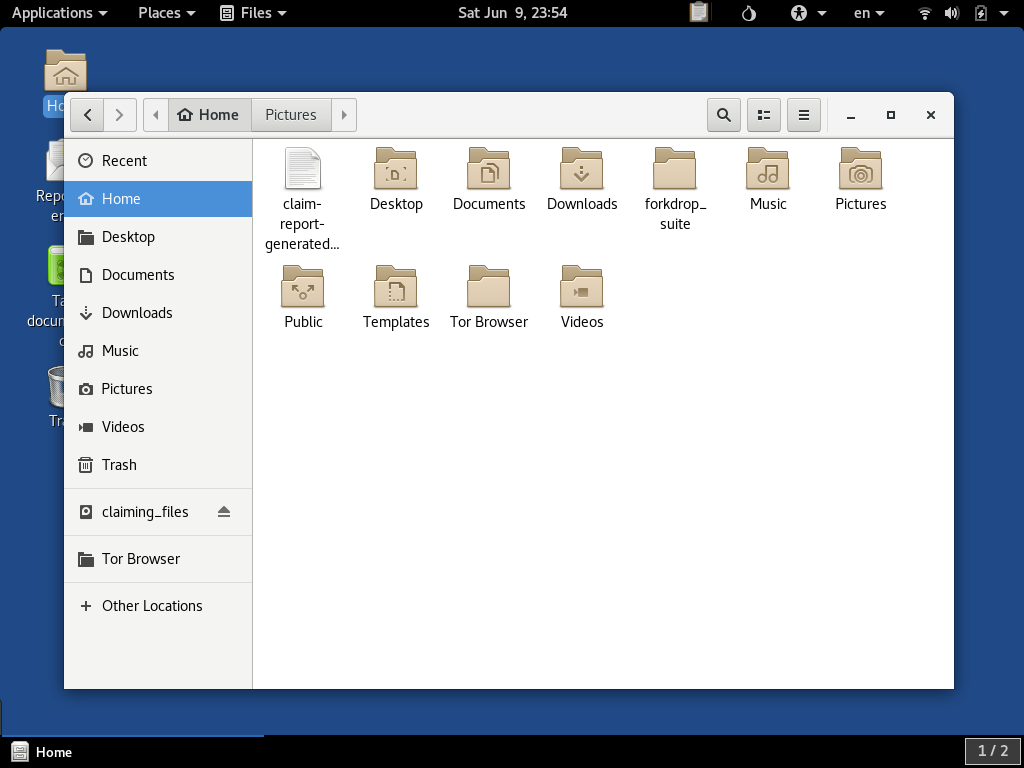
If you double-click the file, it should open up the report in the Text editor:

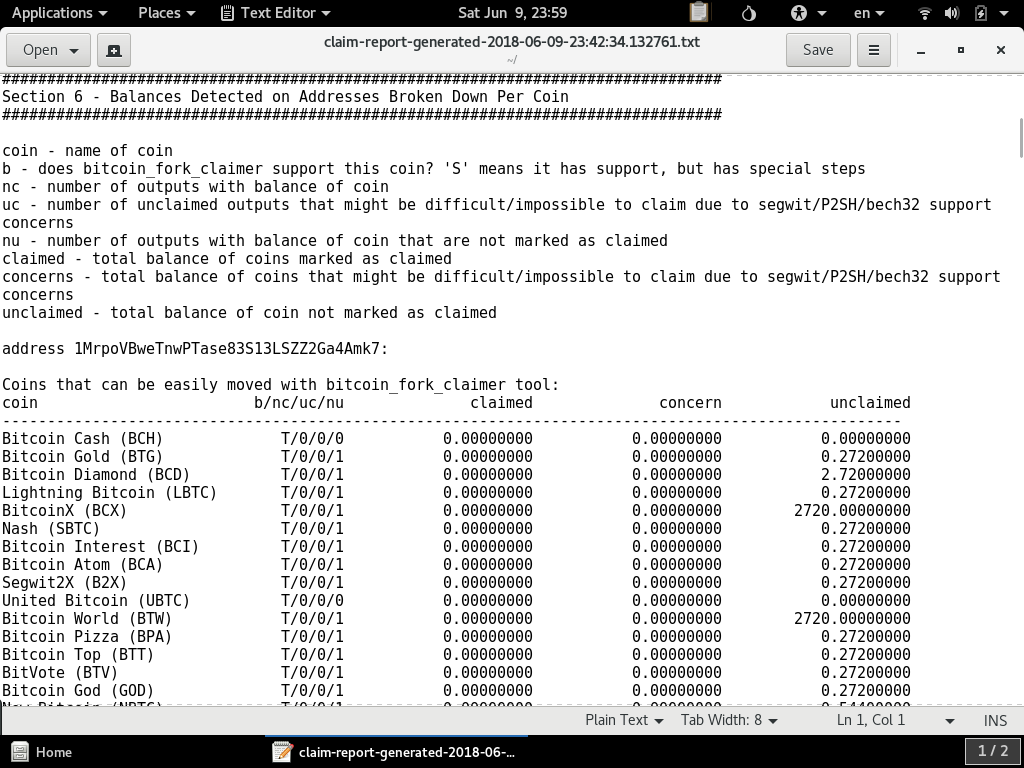
This report is designed for your reading and does a lot of self-explanation, so we are not going to repeat it here. You can view this report for the 1MrpoVBweTnwPTase83S13LSZZ2Ga4Amk7 address here.
If you scroll down in the file, you should see a summary report of coins found on the address or set of addresses:
Claiming Coins
The report reading start-to-finish is there to explain to you the recommended steps for using the bitcoin_fork_claimer tool and provides you the tailored commands for your addresses. We also cover that at a higher level in other guides:
Direct Query Claim Preparation
As mentioned earlier, there are some coins that we can't fully infer necessary details for claiming from the blockchain.info queries. We have the direct-query-claim-prep.py script available with support for some coins that queries
block explorer and SPV host resources specific to those coins. You can give the -h flag to see the usage:

For this example, we will query the BitCore (BTX) resources to find the airdrops to our example address:
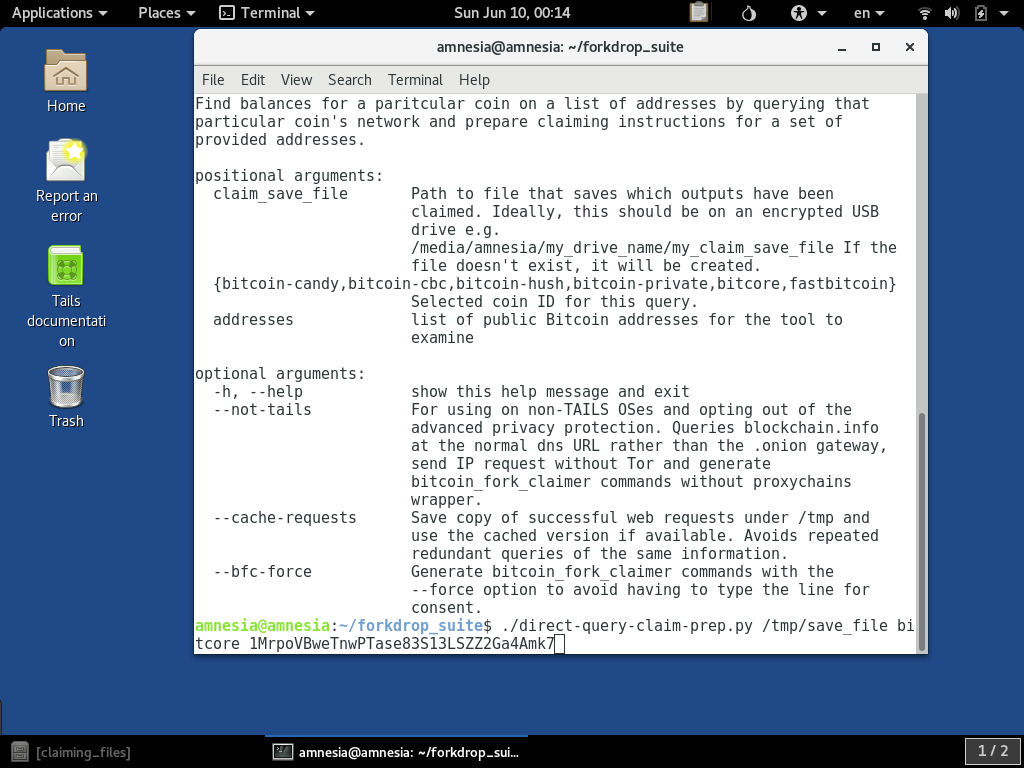
When it is running, you can see it querying the BitCore (BTX) block explorer in yellow. This is less robustly anonymous than the .onion queries since it has to exit Tor to connect to the web service:
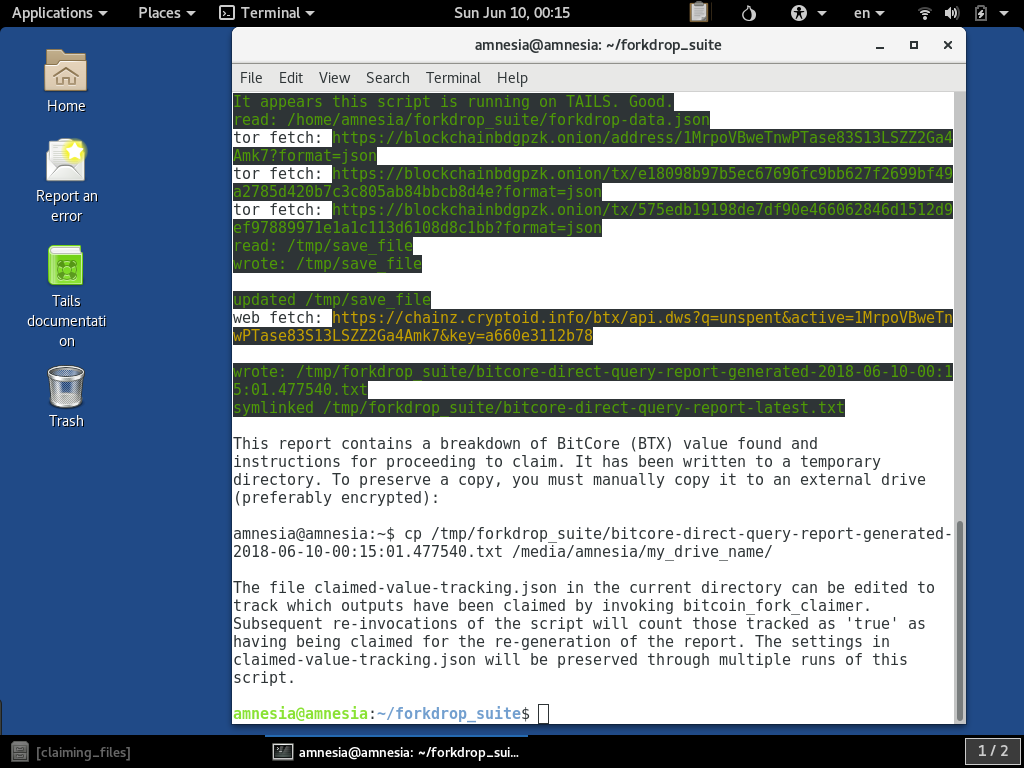
The resulting report is also written to the temporary location and it also gives you the copy instructions for preserving a copy. An example of the BitCore (BTX) report for this address is here.
Caching Tor Requests
For certain uses of the tools, you might be re-running it multiple times. The Tor queries can take a second or two each, and this could lead to a lot of waiting if you have a lot of addresses with a lot of transactions associated with them. To speed things
up and minimize your web traffic footprint, the scripts has a --cache-requests parameter:
When run, it first checks if the request has already been made, and if so, it re-uses the result stored in the temporary cache:
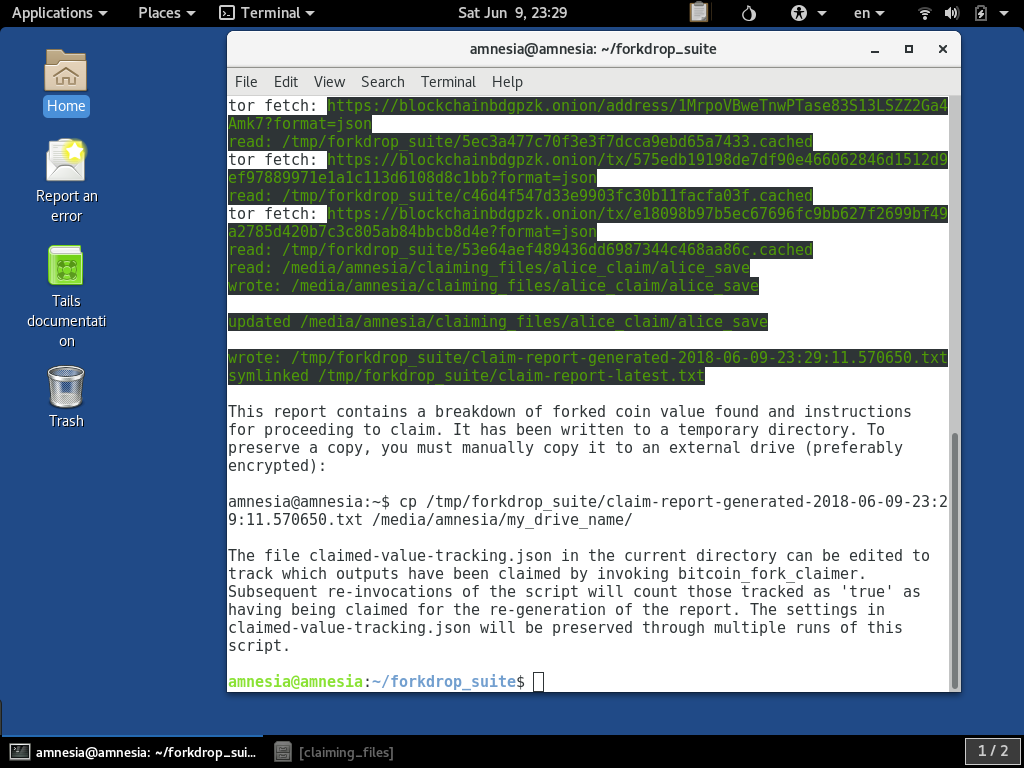
As you can see in the log output, when it goes to fetch the .onion address, it reports it has read a file from /tmp/forkdrop_suite/ directory. The content there was from the previous time that exact request was made using
the --cache-requests option.
Using A Different OS Than TAILS
The scripts are designed to be used on TAILS for the privacy and security features, however it is developed on a non-TAILS Linux OS and it can be run without the privacy and security benefits of Tor and TAILS on that other OS. It might
also work on Windows, but we haven't really tried. To run it in a way that submits over normal non-Tor internet channels, the script can be run with the --not-tails parameter:
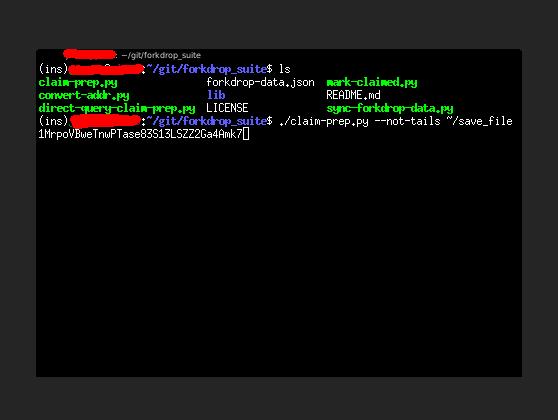
When it runs, the queries it makes will be displayed in yellow: